Posts

PROJECT STAGE3

Image
 Introduction: For Stage III, my goal is to further validate and demonstrate that my project can accurately process multiple cloned functions in a single program and make individual PRUNE/NOPRUNE recommendations for each one. In fact, my project has already supported this functionality since Stage II. To identify cloned functions, I extract the base function name from fun->decl, then iterate over all functions in the program using FOR_EACH_FUNCTION(node) while ensuring each has a valid name. I check if a function’s name starts with the base name and includes a dot (.) afterward, which typically signifies a clone. I also skip any functions containing .resolver in their name. Functions that meet these criteria are printed as cloned functions. This approach allows the detection of multiple clones, assuming they follow GCC’s naming conventions. To enable this analysis, DUMP_ALL must be set to 1 to activate all GCC dumps. For this stage, I will create test cases with at least two clo...

PROJECT STAGE2

Image
Introduction: In this task, I am required to create a pass for the GCC compiler that analyzes cloned functions in a program and determines whether or not they should be pruned. The goal is to identify cloned functions and compare them to see if they are "substantially the same" or different. I will find which functions are cloned and then analyze the differences between the two versions of the function. If the functions are identical except for things like variable names or labels, I will indicate that the function can be pruned. If they are different, I will indicate that the function should not be pruned. The functions are cloned using the FMV (Function Multi-Versioning) mechanism, which automatically handles function versioning. My pass must be positioned late in the compilation process, after optimizations are complete. To compare the cloned functions, I can either examine each statement or use a hash/signature to check if they are the same. Comparing Cloned Function Vers...

PROJECT STAGE1

Image
Project Stage 1 Overview In this project, we will update the compiler to add automatic features, allowing us to create one binary that works on more platforms. In the first stage, we will improve the compiler by adding extra optimization or transformation steps. This includes making a basic GCC pass that goes through the compiled code, prints each function's name, counts how many basic blocks are in each function, and shows the total number of GIMPLE statements in each function.  Step 1:Environment  Setup We will use three separate directories to manage our GCC setup and the modifications made in lab4 : Directories contain: git/gcc Directory – This is the source code directory where the GCC source files are stored. gcc-build-001 Directory – This is the build directory where the compilation process takes place. gcc-test-001 Directory – This is the installation directory where the final GCC binaries and related files are placed after a successful build. Step 2:  Understandi...

LAB5

Image
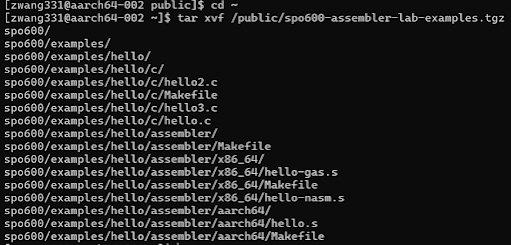
 INTRODUCTION This lab is about exploring assembly language on x86_64 and AArch64 architectures. We will start by running "Hello World" programs written in C and assembly, then use tools like objdump and gcc -S to examine machine code and compiler-generated assembly. The main task is to modify an AArch64 assembly loop to print numbers, first from 0 to 5, then extending it to 00-32 with two-digit formatting, and finally converting it to hexadecimal. After that, we will repeat similar steps for x86_64 assembly. The goal is to understand how low-level programming works, compare different architectures, and gain experience with assembly instructions, system calls, and debugging. Extracting the Archive First, we need to unpack the tar archive on x86_64 and AArch64 using the command: tar xvf /public/spo600-assembler-lab-examples.tgz (AArch64) (x86_64) Building and Running the C Program on x86_64 and AArch64 Building and running the C program using make command. Disassembling Machin...